Having done this once before, and this time having the luxury of time to plan and prepare, we should hopefully end up with a much more liveable van.
Last time we had to accommodate a scooter (Honda Supercub!), which came in handy when exploring the old towns in Japan, as the Delica was a little inconvenient in narrow streets (and parking was expensive!). It also came in very handy for when we travelled to islands and could cheaply take transport with us. This time however, no such compromises were necessary.
Travelling in Japan was much simpler than it will be here in Australia. For example, we only had a tiny insulated box to keep cold food in, but it wasn’t a problem as it was rare to not be near a supermarket to buy whatever we needed fresh for dinner. Fuel and fresh drinking water were plentiful, plenty of mobile coverage and lots of other motorists. Also, due to the bathing culture in Japan, it was very simple to find a place to bathe when the time came.
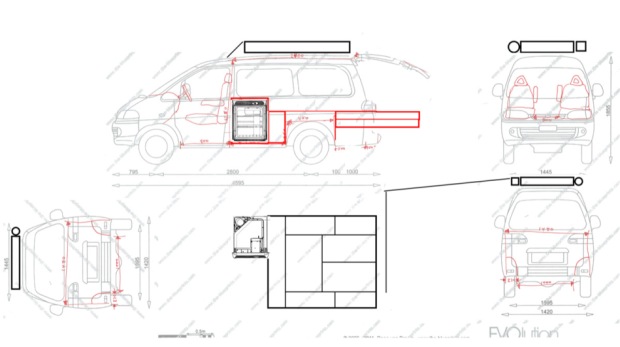
I sketched up a simple plan, to give myself an idea of what would fit.
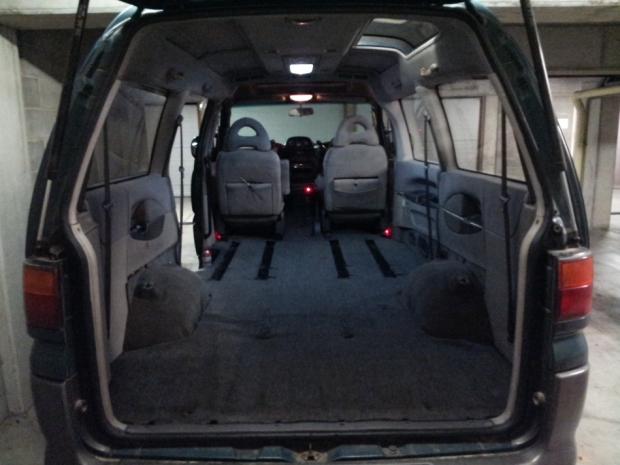
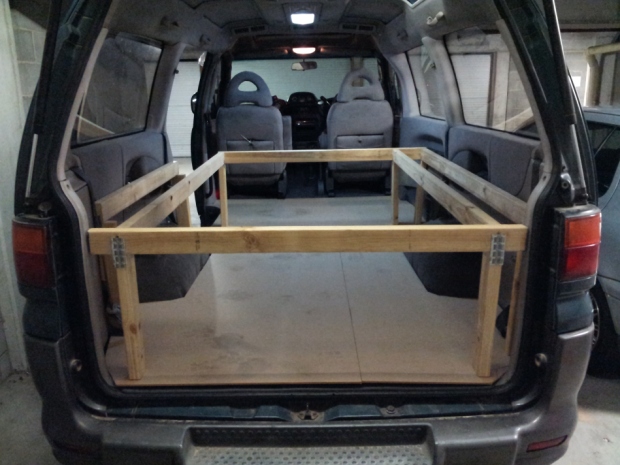 The construction started the same way as last time – removing all the rear seats and building a bed frame out of timber. It may be a little overkill for a bed, but it’s cheap, easy to work with, and relatively easy to repair if something were to break. If I were to build a campervan setup a third time (fingers crossed that I do!), I’d probably go with Aluminium RHS to save some volume and weight, even if there is an added effort/expense.
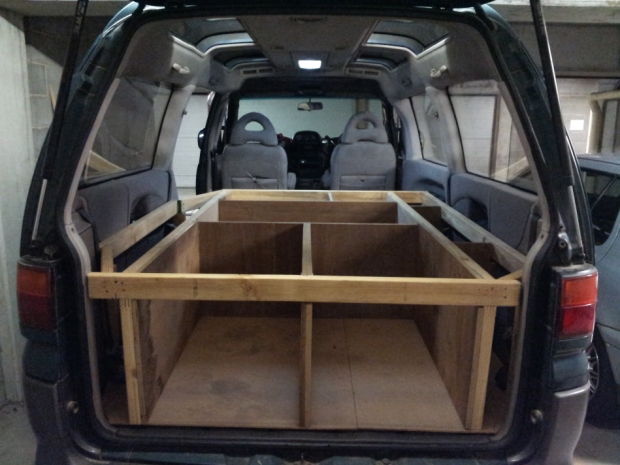
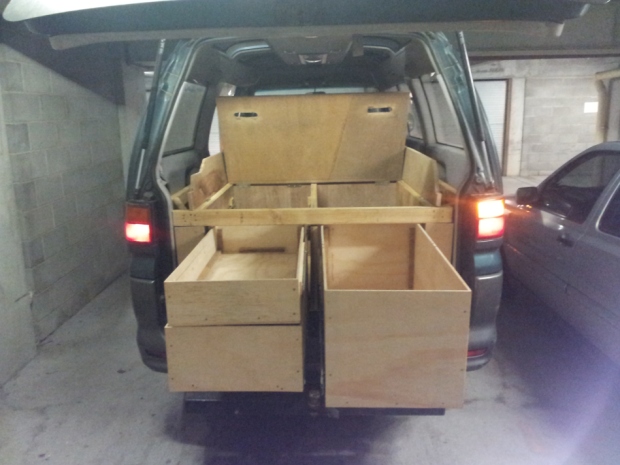
 Under the basic frame, we built in several storage areas for our clothes and equipment that are accessible by opening up the panels that make up the surface the mattress rests on. At the rear of the van, we built in a few drawers for food and cooking that could be pulled out. Fortunately, as I was preparing to start construction, my employer was disposing of several sliding rails for server equipment. It took a little bit of hacking to get it to work for our needs, but it has saved us a decent amount of money.
The bed and internal storage was now functional, but it still looked very… unprofessional (which is rather apt). Wrapping it in an automotive carpet has done wonders – it looks finished.
On top of this surface, there is a queen-size 50mm thick high-density foam mattress, topped with a 30mm memory foam layer. This combination gives enough support without being too thick or heavy.
The rear of the van has been converted into a mini-theatre, with a micro projector (Dell M110 – 720p, 300lm and only 45w), some 6×9 speakers and a 55” screen that folds down from the roof. One of the compartments in the bed hinges upwards to convert the bed into a couch, to make viewing just a little more comfortable.
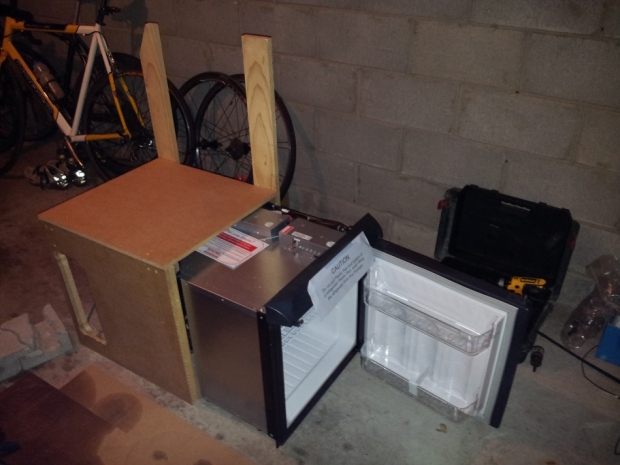
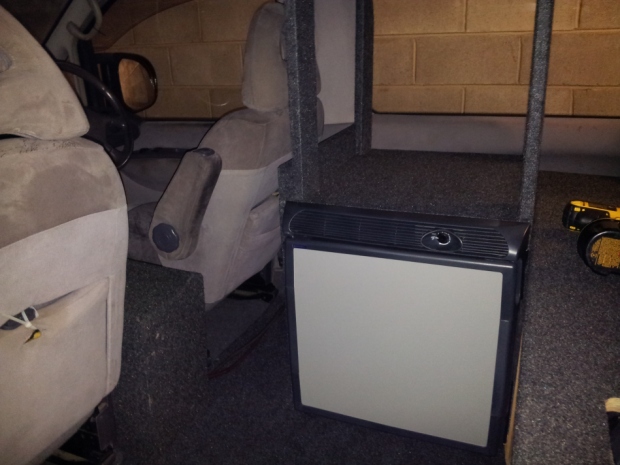 Between the bed and the driver’s seat, a frame was built to enclose the upright fridge. We decided to go with an upright (57L Engel) as we thought it would save us space. On top of this we had space to store 60L of water (in 3x 20L containers). The Engel fridge is very efficient, with a 12v current consumption of only 2.5A (with duty cycle dependent on ambient temperature). They also make a 40L version, but their external physical dimensions were almost the same and it was only a small extra premium to purchase the larger model.
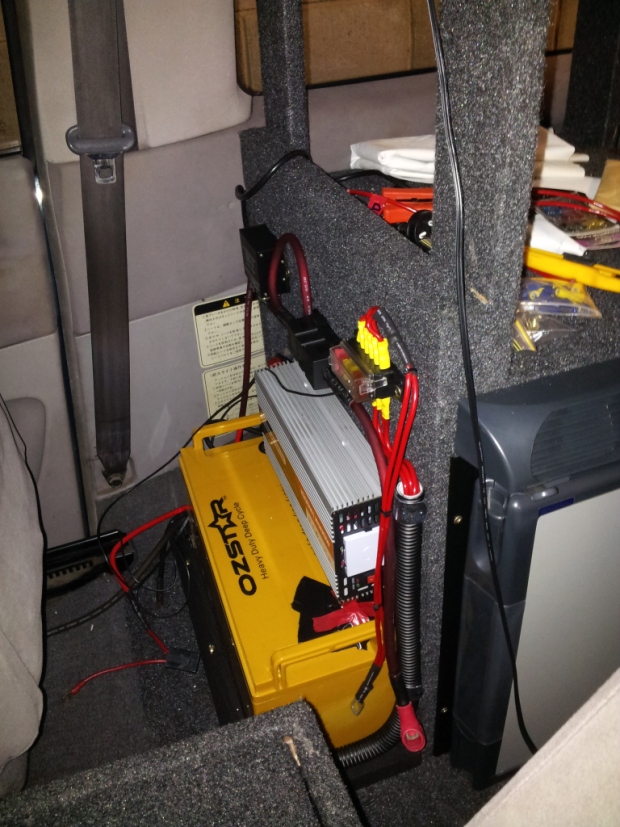 In the narrow cavity between the fridge and the driver’s seat all the new electrical components are mounted, such as: a 120AH AGM battery – a deep cycle battery to power our auxiliary components, like fridge, lighting and entertainment; an automatic dual battery isolator – to isolate the starting batteries and ensure that they still have charge to start the car, even if the auxiliary battery has gone flat; a 1000W pure sine-wave inverter – to provide proper 240V AC power for things like a rice cooker, or camera battery charger, or even hair curling irons; an MPPT (Maximum Power Point Tracking) controller for the roof-mounted solar panel; fuses and other various electrical connections.
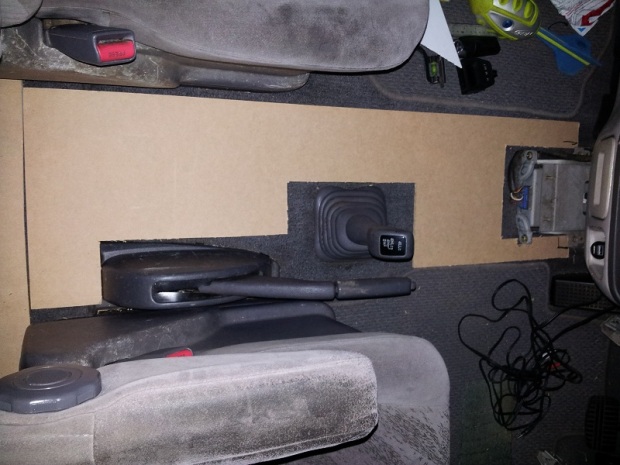
 Up front, we built a custom centre console between the front seats. It is a slightly tricky area to use, as there is a 4WD selection and a hand brake lever also there, still accessible through a cavity in the console. There were also additional cigarette lighter sockets to power laptops, phone chargers and a GPS unit. There is another small cavity underneath the dashboard, where we will store various other electrical components, such as a Raspberry Pi to run our entertainment system and a dual HDD for data backups.
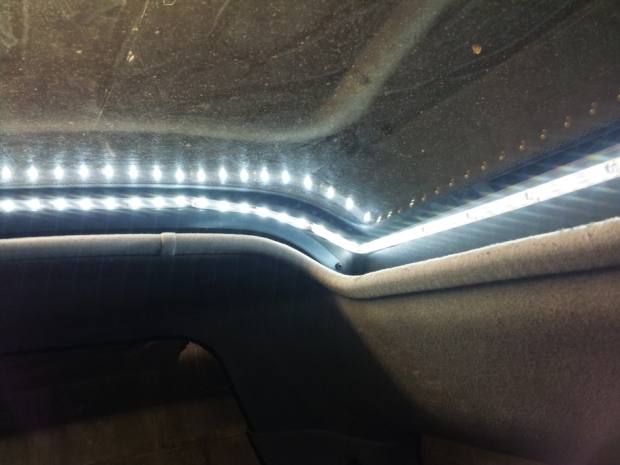
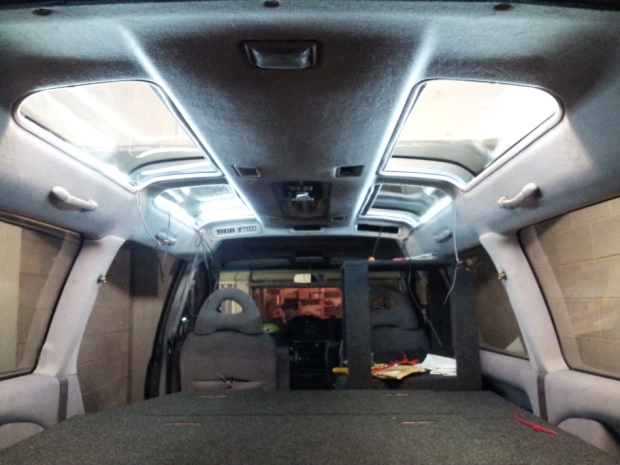 LEDs have been used extensively within the car, primarily to reduce the energy consumption. In the rear cabin, the crystal lite sunroofs have been surrounded with warm white LED light strips, controlled by a remote dimmer. There are 300 LEDs in use, with a total power consumption of only 5W! For the exterior a slightly higher wattage LED strip lighting has been installed – inside the rear door, to provide lighting while open above the kitchen and also above the rear sliding door. Other standard interior lights have also been replaced with LEDs where possible.
To keep the mosquitoes and other insects out, custom flyscreen netting has been installed in the opening of the rear door, as well over the front sunroof to allow flowing ventilation. Previously, we’d used an elastic netting ‘sock’ that slipped over the driver/passenger door windows. It was quick and easy to install and remove, but the ventilation wasn’t ideal especially when we had the curtains between the rear and the front closed.
For privacy in the rear, we have cut pieces of thermal foil to size. The foil is foam backed, so it’s white on the interior, and shiny aluminium foil on the outward facing side. To make it not look like a mobile meth lab, the rear windows have all be tinted with a 5% visible light (limousine tint) tint, which we applied ourselves – the first window we did, the sliding window, was almost too easy, though results seemed to get worse as time went on, with a few creases and bubbles starting to appear.
Mechanical modifications are mostly limited to preventative maintenance and efficiency improvements, since even a small improvement in fuel consumption will save us a lot of money over the 30,000km trip. Filters have been replaced, intercooler piping has been swapped for stainless steel items, a t0me 6mm steel bash plate fitted, the radiator hoses and expansion tank have been replaced and the cooling system has been flushed, a heat exchanger for a shower has been added, belts have been replaced, two new starting batteries added, injectors have been cleaned, air filter has been replaced with a foam Unifilter and a 2.5” turbo back exhaust has been added. Aesthetically, I would have loved to add a snorkel and add a few inches of lift, complete with larger wheels, but as they weren’t considered necessary for the locations that we were planning on visiting, they didn’t happen.
On the roof there is a full-length (2200mm) roof cage. The cage is enormous! I feel like I may have made a mistake purchasing something so large – it’s larger than our bed! At the front of this is mounted a 120W solar panel to help provide power to the deep-cycle battery for occasions that we spend more than a day or two in the one location. Also on the roof is a 50L water tank, built from 150mm PVC pipe. This water will be used for showering, via a heat-exchanger.
I wanted to install a secondary, long-range fuel tank to increase the distance between fuel stops in some of the more remote areas that we are travelling to. I changed my mind when I saw the prices! So, we’ll do it the manual way instead with 2x 20L jerry cans that we will store on the roof cage.

Eli Lindner
Looks sweet as. Forgot I had a pocket hole jig though, that could have saved you a bit of effort on constructing the boxes. One of the advantages of a snorkel would be if you are going through dusty country, stops your air filter getting clogged up with dirt.
PEKOiSM
Of course you have the tools for the job! I should have just left the van at your house 😀
I’d heard that about the snorkel, too. But, will just clean the foam filter as frequently as is required… (hopefully it’s not daily).
肉ジョウズ
😀
Honestly. I just sat here like that for a while. Holy hell, sir.
I want to see a video at some point of things like the shower in action.
outbackjoe
Awesome setup. I’m jealous of people with vans. It’s a really good solution for touring oz.
PEKOiSM
Thanks, it does the job. We’re certainly comfortable (though, not as comfortable as the Grey Nomads in their 10m long caravans).
Sean Holland
Ross, I after reading your most recent post on Tunnel Creek, I thought “I wonder what they did for bug screens in that van?” I was going to ask, but I figured you maybe had something explaining it. Wow, what an amazing explanation! I’m even more jealous of your adventure now. Did I remember you mentioning that you’d be selling Deli-chan when your trip was done…? 🙂
PEKOiSM
Haha, thanks! It has its flaws though (for instance, there is nothing stopping bugs getting in to the kitchen area when we have the rear door open).
Deli-chan will most definitely be for sale come November 😉 (we’re moving back to Niseko then EU). Can’t recommend this trip enough, Australia is a beautiful country, and a 4WD is the way to see it.